2. Hardware
2.1. Power Switch

Right of unit with power switch
The power switch is on the right side of the unit, move the switch forward to turn on the unit, and push away to turn off.
2.2. Morse Key socket
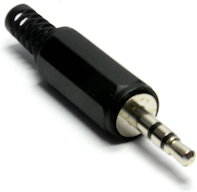
3.5mm jack plug
On the Right side is a 3.5mm stereo style socket into which you plug your morse straight key or paddle.
Shield is wired to the common ground.
Ring is wired to dash side of paddle or not connected
Tip is wired to dot side of paddle or straight key
2.3. Audio Output via 3.5mm Jack
The 3.5mm jack on the back of the unit serves dual purposes and can be configured to operate in two different modes:
Key Output Mode (Default)
In this mode, the 3.5mm jack provides digital key signals for external keying circuits or LED indicators:
Tip: Dot signal output (active LOW when dot is pressed)
Ring: Dash signal output (active LOW when dash is pressed, if Paddle Output is enabled)
Shield: Common ground
This mode is useful for:
Connecting external LED indicators
Interfacing with radio transmitters
Connecting to other keying circuits
Audio Output Mode
In this mode, the 3.5mm jack outputs audio tones, allowing you to connect external speakers or headphones:
Both Tip and Ring output the same audio signal
Volume is independently controllable (0-100%)
Tone and Octave settings apply to the audio output
This mode is useful for:
Connecting external speakers for louder practice
Using headphones for private practice
Recording morse code output
Switching Between Modes
You can switch between Key Output and Audio Output modes via the web interface:
Connect to device web interface
Navigate to Hardware Configuration page
In the "Output Configuration" section, toggle "Audio Output"
Adjust "3.5mm Jack Volume" if using Audio Output mode
Click "Save Hardware Settings"
Volume Control
When in Audio Output mode: - Use the "3.5mm Jack Volume" slider to control external audio volume (0-100%) - The internal buzzer volume is controlled separately via "Internal Buzzer Volume" - The "Sound Enable" master toggle affects both outputs
Note
The 3.5mm jack audio output uses PWM (Pulse Width Modulation) to generate audio tones. The quality is suitable for morse code practice but is not hi-fi audio quality. A simple speaker or piezo element works best.
2.4. Paddle Hand Configuration
The Morse Trainer supports both right-hand and left-hand paddle operation. You can easily switch between them using either the on-device settings screen or the web interface.
How to Change
Via Settings Screen:
Enter Settings screen
Press the "Right/Left" button on Page 1
Button displays current configuration
Press to toggle between modes
Via Web Interface:
Connect to device web interface
Navigate to Morse Configuration page
Select "Right Hand" or "Left Hand" from Paddle Hand dropdown
Click "Save Morse Settings"
Note
Your paddle hand preference is saved to device memory and persists across reboots.
2.5. Charging
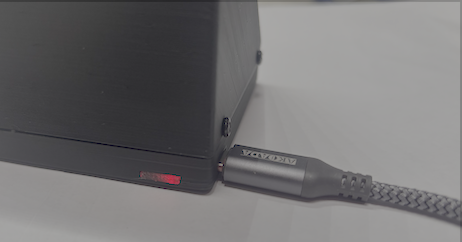
Back of unit showing charging lights
Warning
Be sure to use a USB-A to USB-C cable to charge.
If you observe the screen begin to flicker then it's a sign the battery is getting low. Plugin to recharge the battery.
The unit can continue to function while recharging.
The Morse Trainer has a 18650 Li-ion battery inside. This will run the unit for around a day. This battery can be recharged via the USB-C socket on the left side. At the back a red light is displayed while charging and blue when the battery is fully charged.
2.6. NRC unit
A Morse Trainer unit has been dontated to the NRC (National Radio Center, Bletchly Park). It's on the front reception desk for anyone to practice their morse code. If you can't find it please ask a member of staff.
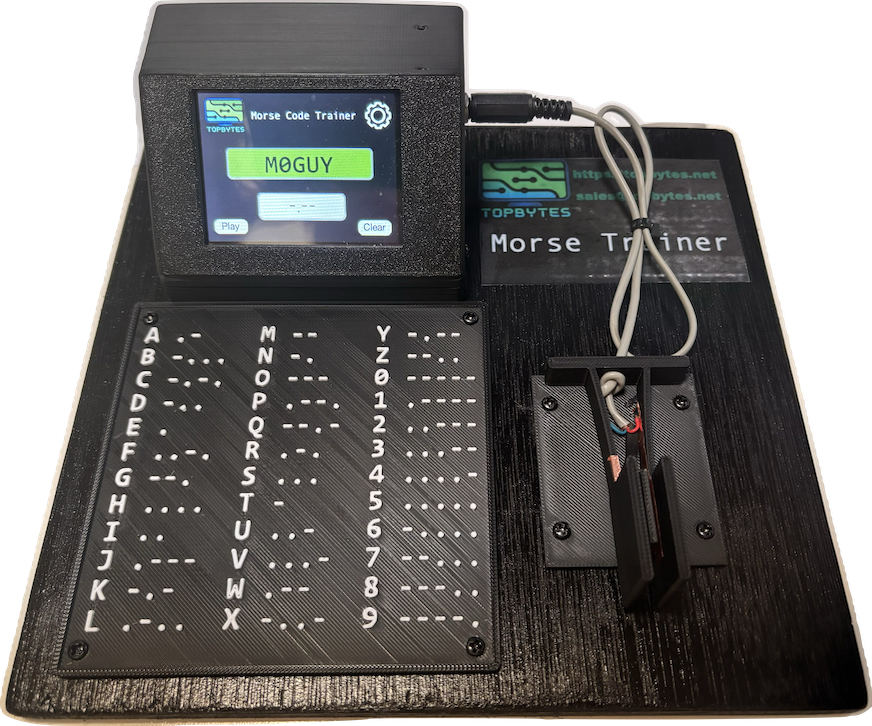
NRC demo unit with paddle and morse reference chart
The paddle is also 3D printed, details of making your own paddle can be found on Thingiverse https://www.thingiverse.com/thing:7023246